photoPopup Quickstart
by Marion Bates <the.bates at gmail.com>
This document describes the steps needed to process images with photoPopup, a project created and maintained by Derek Hoiem of Carnegie Mellon University. From the webpage:
Our system automatically constructs simple "pop-up" 3D models, like those one would find in a children's book, out of a single outdoor image. The system labels each region of an outdoor image as ground, vertical, or sky. Line segments fitted to the ground-vertical boundary in the image and an estimate of the horizon's position provide the necessary information to determine where to "cut" and "fold" in the image. The model is then popped up, and the image is texture mapped onto the model.
The theoretical and inner workings of the system are not described in this document -- merely, how to apply the system to an image of your choosing. This procedure was used under a combination of Fedora Core 5 and Mac OS X (the latter for using Photoshop and viewing the final product in a VRML-enabled browser).
NOTE: A reader of this howto has reported errors with segment under Cygwin. We're looking into it.
Steps:
- Download app.zip and MCRInstaller.zip from here and unzip both. For purposes of this example, we're putting them both in /home/mbates. Unzipping MCRInstaller.zip will generate a directory called "v73" and unzipping app.zip will generate a directory named "app".
- Run the following two commands, making sure you have the correct equivalent of /home/mbates (each command should be on one line, copy/paste _should_ work here because of the backslashes but be careful):
export LD_LIBRARY_PATH="/home/mbates/v73/runtime/glnx86:\
/home/mbates/v73/sys/os/glnx86:\
/home/mbates/v73/sys/java/jre/glnx86/jre1.5.0/lib/i386/native_threads:\
/home/mbates/v73/sys/java/jre/glnx86/jre1.5.0/lib/i386/client:\
/home/mbates/v73/sys/java/jre/glnx86/jre1.5.0/lib/i386:\
/home/mbates/v73/bin/glnx86"

export XAPPLRESDIR="/home/mbates/v73/X11/app-defaults"
and don't exit the shell until you're through with all these steps.
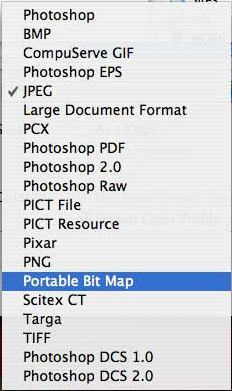
- Open your original image (e.g. "image.jpg") in Photoshop or some other graphics editor with multiple format support, and save it as "Portable Bit Map (PBM)".
- Download "segment" from here. Untar, cd segment, and type:
make
- Assuming no compiler errors, run the following command, specifying whatever you want for the output path:
./segment 0.8 100 100 /path/to/image.pbm /output/path/image.pnm
always using those three numbers -- the author of photoPopup determined those to be the ideal settings. (Though experimentation is always an option -- consult the segment docs for more info.) "image.pnm" will be created under the path you specify as the last argument to segment.
It is strongly recommended that you make a dedicated directory for each project, since the process generates a lot of files in that directory. E.g. make a "results" directory as suggested by the author. Put your original image.jpg in that directory, along with the image.pnm that you just made with segment. You can throw away the pbm version now, you don't need it anymore.
- Go into the "app" directory and run the following command, specifying paths appropriately:
./photoPopup ./classifiers_08_22_200.mat /path/to/image.jpg pnm /same/path
- View it!
Walkthrough, with a real image:
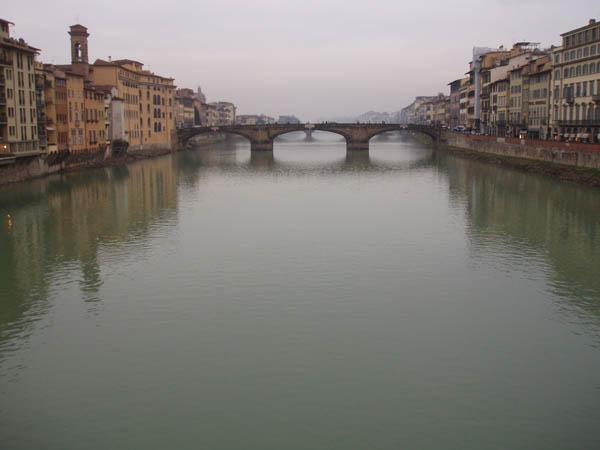
- Original jpeg:
- Opened in Photoshop, saved as Portable Bit Map:
- Moved it to linux box. Ran segment:
./segment 0.8 100 100 ../florence.pbm ../florence.pnm
(output:)
loading input image.
processing
got 205 components
done! uff...thats hard work.
This generated a .pnm file which I can view in Photoshop, and it looked like this:
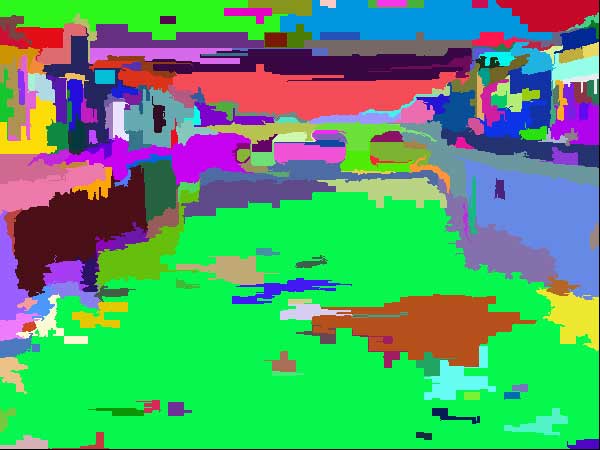
like, far out, man!
- Made a dir called "florence" and put my original jpg and the new pnm file in it. Then ran:
./photoPopup ./classifiers_08_22_2005.mat ../florence/florence.jpg pnm ../florence
- When this process finished, the florence contents were:
florence.pnm
florence.l.jpg
florence.h135.pgm
florence.h090.pgm
florence.jpg
florence.hpor.pgm
florence.v000.pgm
florence.g.png
florence.vsky.pgm
florence.v090.pgm
florence.wrl
florence.v.png
florence.hsol.pgm
florence.h045.pgm
The .wrl file is the VRML data, that's what you would open in a viewer/browser (see below). But it needs the rest of the files in that directory too, so keep 'em all together.
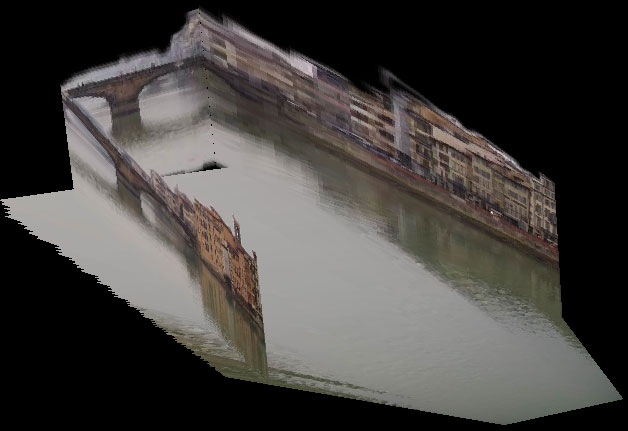
- This is a screen shot of the final product, in a VRML browser. I used "study" mode, which shows the...edges? of the popups so you can see how the illusion works. Or something like that. There's really no way to convey it with a still shot, but you get the idea, maybe:
Viewing the result:
Linux:
- Download openvrml from here. Untar, cd into the directory and run ./configure. It will probably error out the first 23 times you try it, due to missing dependencies...in my case, I had to add all of the following via yum. (In some cases I had the base package but not the -devel one, so am listing all here for clarity):
gcc (duhhhhh)
gcc-c++
mozilla
mozilla-devel
mesa-libGL
mesa-libGL-devel
mesa-libGLU
mesa-libGLU-devel
SDL-devel
gtk+
gtk+-devel
gtk2
gtk2-devel
boost
boost-devel
libjpeg
libjpeg-devel
libpng
libpng-devel
doxygen
and libjs and libjs-devel from here (which may have been an unnecessary step, try with just the above list first).
- Re-run configure until it becomes happy, then do make. It takes a looooong time. ...in fact, it never finished compiling for me, so I gave up...sorry. But in theory, once you make install and (re)launch Firefox/Mozilla, you should be able to select Open File and choose the .wrl file mentioned above, and have it work.
Viewing VRML on Mac OS X:
- Download the Cortona VRML plugin from here. Install it by placing it in /Library/Internet Plug-Ins/
- Quit Firefox if it's running, and relaunch.
- From within Firefox, select "Open File..." and navigate to the output directory you specified in the last step above ("results"). Choose the file with the .wrl suffix.
Windows:
- No idea but probably something very similar to the Mac OS X instructions above. Google for "Windows VRML browser".
References: