Snipe-IT is a nice-looking, easy to install, easy to use inventory system which has a feature I’ve always wanted: Asset stickers using QR codes which, when scanned with a smartphone, take you straight to the inventory system’s details page for that asset. YES!
Here’s the scenario that led to this howto:
- A school I work with is using Meraki Systems Manager
- They've installed the agent on all your PCs/Macs, and enrolled their iPads
- They do NOT have a central inventory system/asset stickers
So, they’ve already GOT a lot of inventory-related metadata. And I’ll do just about anything to avoid hand-typing a serial number…
PREREQUISITES: A working Snipe-IT installation with:
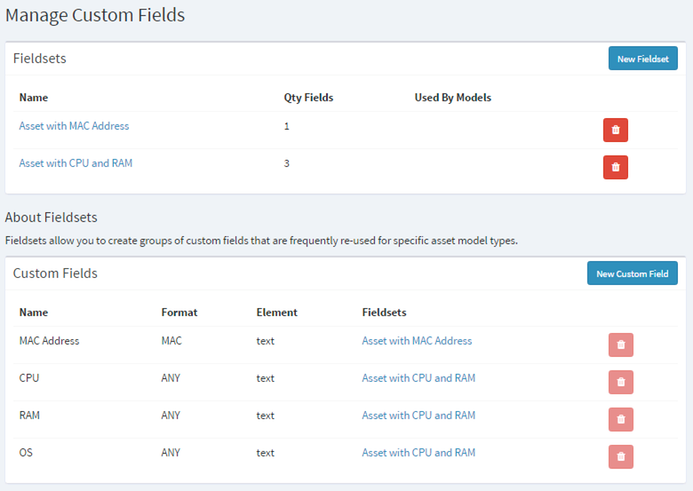
A. Custom fields and field sets to accommodate MAC Address, OS, RAM, and CPU (if you care about them.) Mine looks like this — I think MAC Address and its fieldset were already there as a demo, and I just modeled the rest off of that:
B: Asset categories (e.g. Laptops, Desktops, Tablets, Chromebooks)
C: Manufacturers (e.g. Lenovo, Apple, HP, Dell)
D: Suppliers (if you care)
E: An asset numbering scheme/plan (in this example, 10001, 10002, etc.)
F: A BACKUP OF YOUR SNIPE-IT DB BEFORE YOU DO THIS.
OKAY! In Meraki, identify the machines we want to bring over to Snipe-IT. You might want to tag them for easier identification later. (We’ve got some duplicate entries and some known-dead equipment still in the Meraki list so we’re going to avoid those.)
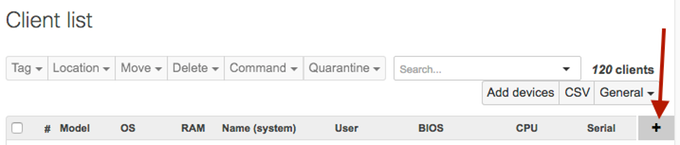
1. In the Meraki client list view, click the plus sign to bring up the column picker:
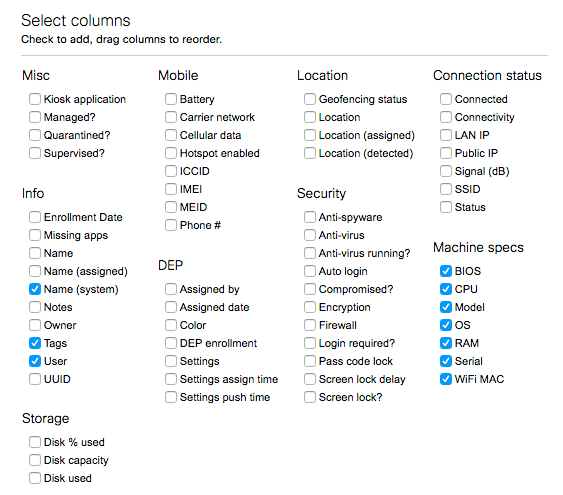
2. Select the following columns:
3. Press the CSV button:

4. Open the resulting file and sort on the Tags column, get rid of the entries you don’t want, clean up the ones you do, etc. When you’re fairly happy with it, paste it into the MERAKI tab of the spreadsheet template attached here.
5. Switch to the SNIPEIT tab of that spreadsheet template. You should see that it has copied over everything from the MERAKI columns into a ready-for-import-to-Snipe-IT set of columns, which are all white.
6. On the SNIPEIT tab, every GREEN column needs input from you; every column with a PINK heading is required by Snipe-IT. When you’ve filled in everything required, go to Save As and specify “comma-separated (csv)” (make sure that the SNIPEIT tab is the active sheet.)
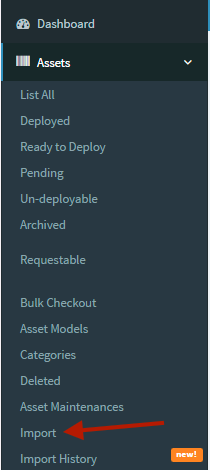
7. In Snipe-IT, show the lefthand nav bar (click the three hotdogs) and go to Assets -> Import:
Then “Select Import File…” and navigate to the .csv you exported in step 6:
Click “Process” and see how you fare!
References: